Monday 31 August 2015

Five Free Motion Quilting Myths and How You Can Overcome Them!

File:We Can Do It!.jpgMy journey to free motion quilting was a long and winding one, peppered with a lot of obstacles, most of which were myths in my own head. I know I’m not alone in believing them. I thought it’s time we talk about them more openly and see if  we can't get rid of a few obstacles for some of you too.

Myth #1: You have to be a very experienced quilter (a.k.a. quilting for 20 years). 

Prior to discovering the online quilting community five years ago, the only quilters I knew who were great at free motion quilting were my senior by at least 10 years. Then I found Leah Day on YouTube when she was about 25. That woman’s got skillz! I said to myself, if she can do it, then surely I should be able to learn it before I retire.

Myth #2: You have to become good at piecing before you try free motion quilting. 

If you get really good at piecing, you may find that you become afraid of quilting your top because you don’t want to ruin it. Don’t wait! There’s no rule that you can’t build those skills at the same time.

If you are already a good piecer and find that you are now afraid to quilt your own quilts, make little projects like coasters, mug rugs, and placemats or quilt-as-you-go projects. It’s going to get coffee or food stains on it anyways so who cares if your pebbles aren’t perfectly round?

Myth #3: You need a fancy long arm machine or a stitch regulator. 

Nope, they are nice and helpful, but they don’t do the quilting for you. You do need a machine that works properly though. If you are trying to free motion quilt and are having a lot of problems with threads breaking or nesting and you’ve tried all the usual fixes (cleaning, rethreading, new needle, different thread) without success, there may be something wrong with the machine. The needle timing may be off or there may be burrs that don’t affect regular straight stitching, but interfere with free motion quilting. Try quilting on someone else’s machine (or demo a machine in a quilt shop – shh!). If you can do it without breaking threads on their machine, bring yours in for a servicing and tell the technician what problems you are having.

Myth #3: Free motion quilting is too complicated or advanced for you. 

If you can handwrite or drive, you can free motion quilt. Yes, really! Were you able to write cursive the first day you learned how to write the letter A? No! You practiced those damn As until you hated them and then you practiced those stupid Bs. You may not remember the frustration of trying to get those curves right because you were 5 or 6 at the time (I sure did because I had to do remedial handwriting classes – the joys of being a lefty), but you probably do remember how weird and jerky it was to have to drive at first? Eventually you stopped braking in the middle of the curve and did it before the turn, right? Free motion quilting just takes practice, practice and more practice. Did I mention it takes practice? Seriously. Do one coaster or mug rug a day with a different motif each day, every day for a few weeks. Wax on, wax off, Quilter-san!

Myth #4: You don’t want to waste fabric, batting and thread on something you won’t like. 

If your stash is too new and pretty to 'waste', go get some fuglies to practice on – either buy it in the clearance section or ask a long-time quilter if they have some to spare. As someone who is blessed with an abundance of “what was I thinking?” fabrics, I assure you that they would probably be happy to share some with you (if only to relieve themselves of the guilt of feeling they have to use it). I keep my batting leftovers for practice quilt sandwiches. As for the 'waste', I keep my better practice sandwiches on a ring as a reference for quilting ideas.

Myth #5: You are left-handed in a right-handed world. 

Okay, I’m totally making this one up (Five myths just seemed better than four). We lefties never let this one stop us!

Enough myths busted for you? What other myths about free motion quilting are holding you back? Going to give it a go?

Loop left, loop right, Quilter-san. You got this!

By the way, I'll be teaching my Modern Free Motion Quilting Sampler class on Saturday, October 3rd at Mad About Patchwork. Also, while you're there, check out the other great classes Pam has lined up for the Fall. There's even one based on Sherri Lynn Wood's book that I mentioned in my last post!

Friday 28 August 2015

A New Favourite

Looking for a good quilty read? Try The Improv Handbook for Modern Quilters by Sherri Lynn Wood. I won it in a giveaway from The Quilting Edge (thanks Marianne!) about a month ago. I've read it from cover to cover. Every single word.

I love how Sherri Lynn organized the book with 'scores' rather than patterns. The scores fully embrace the spirit of improv quilting, giving you enough guidance without being too prescriptive. Genius!

I'm not a novice when it comes to improv and I've read a number of books on improv quilting, but I still learned so much from this one. Especially how to fix issues or problems, which I think is the most challenging part. If you are interested in improv quilting, this is the book to get.

And no, no one asked me to review the book and this isn't a sponsored post -- I just really like the book. I'm knee-deep in other projects right now, but there will be projects from this book in the future. Oh yes, there will be projects...


Have a great weekend!

Thursday 20 August 2015

Rainbow House - A Work in Progress

If you follow me on Instagram (@quiltmatters), you've probably seen my photos from our workshop with Lizzy House. I'll admit that I wasn't so keen on the Meadow Quilt pattern at first, but I love Lizzy's fabric. Don't get me wrong, her Meadow quilt is gorgeous, but it's not really my style.

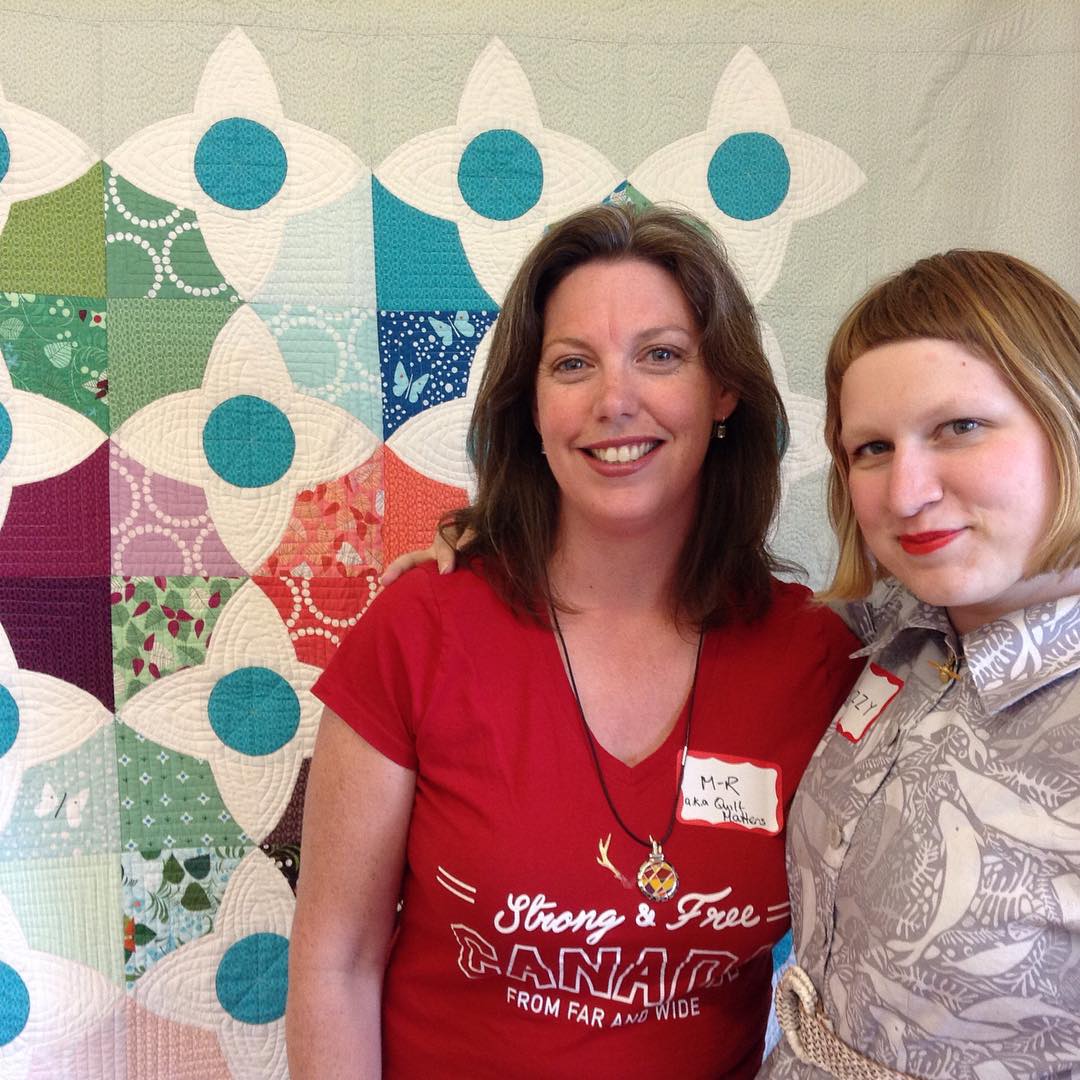
I wanted to meet her and take a workshop with her though so when the Ottawa Modern Quilt Guild (thank you, Laura!) brought her in to teach her Meadow quilt workshop, I signed up right away. Boy was it worth it! I learned a couple of new things and I've started what I think will end up being one of my favourite quilts.

Look! Me and Lizzy and her beautiful Meadow quilt. :D

Great class with Lizzy House today! 😃 Thanks @Lizzyhouse! #meadowquiltworkshop #ottmqg #meadowquilt

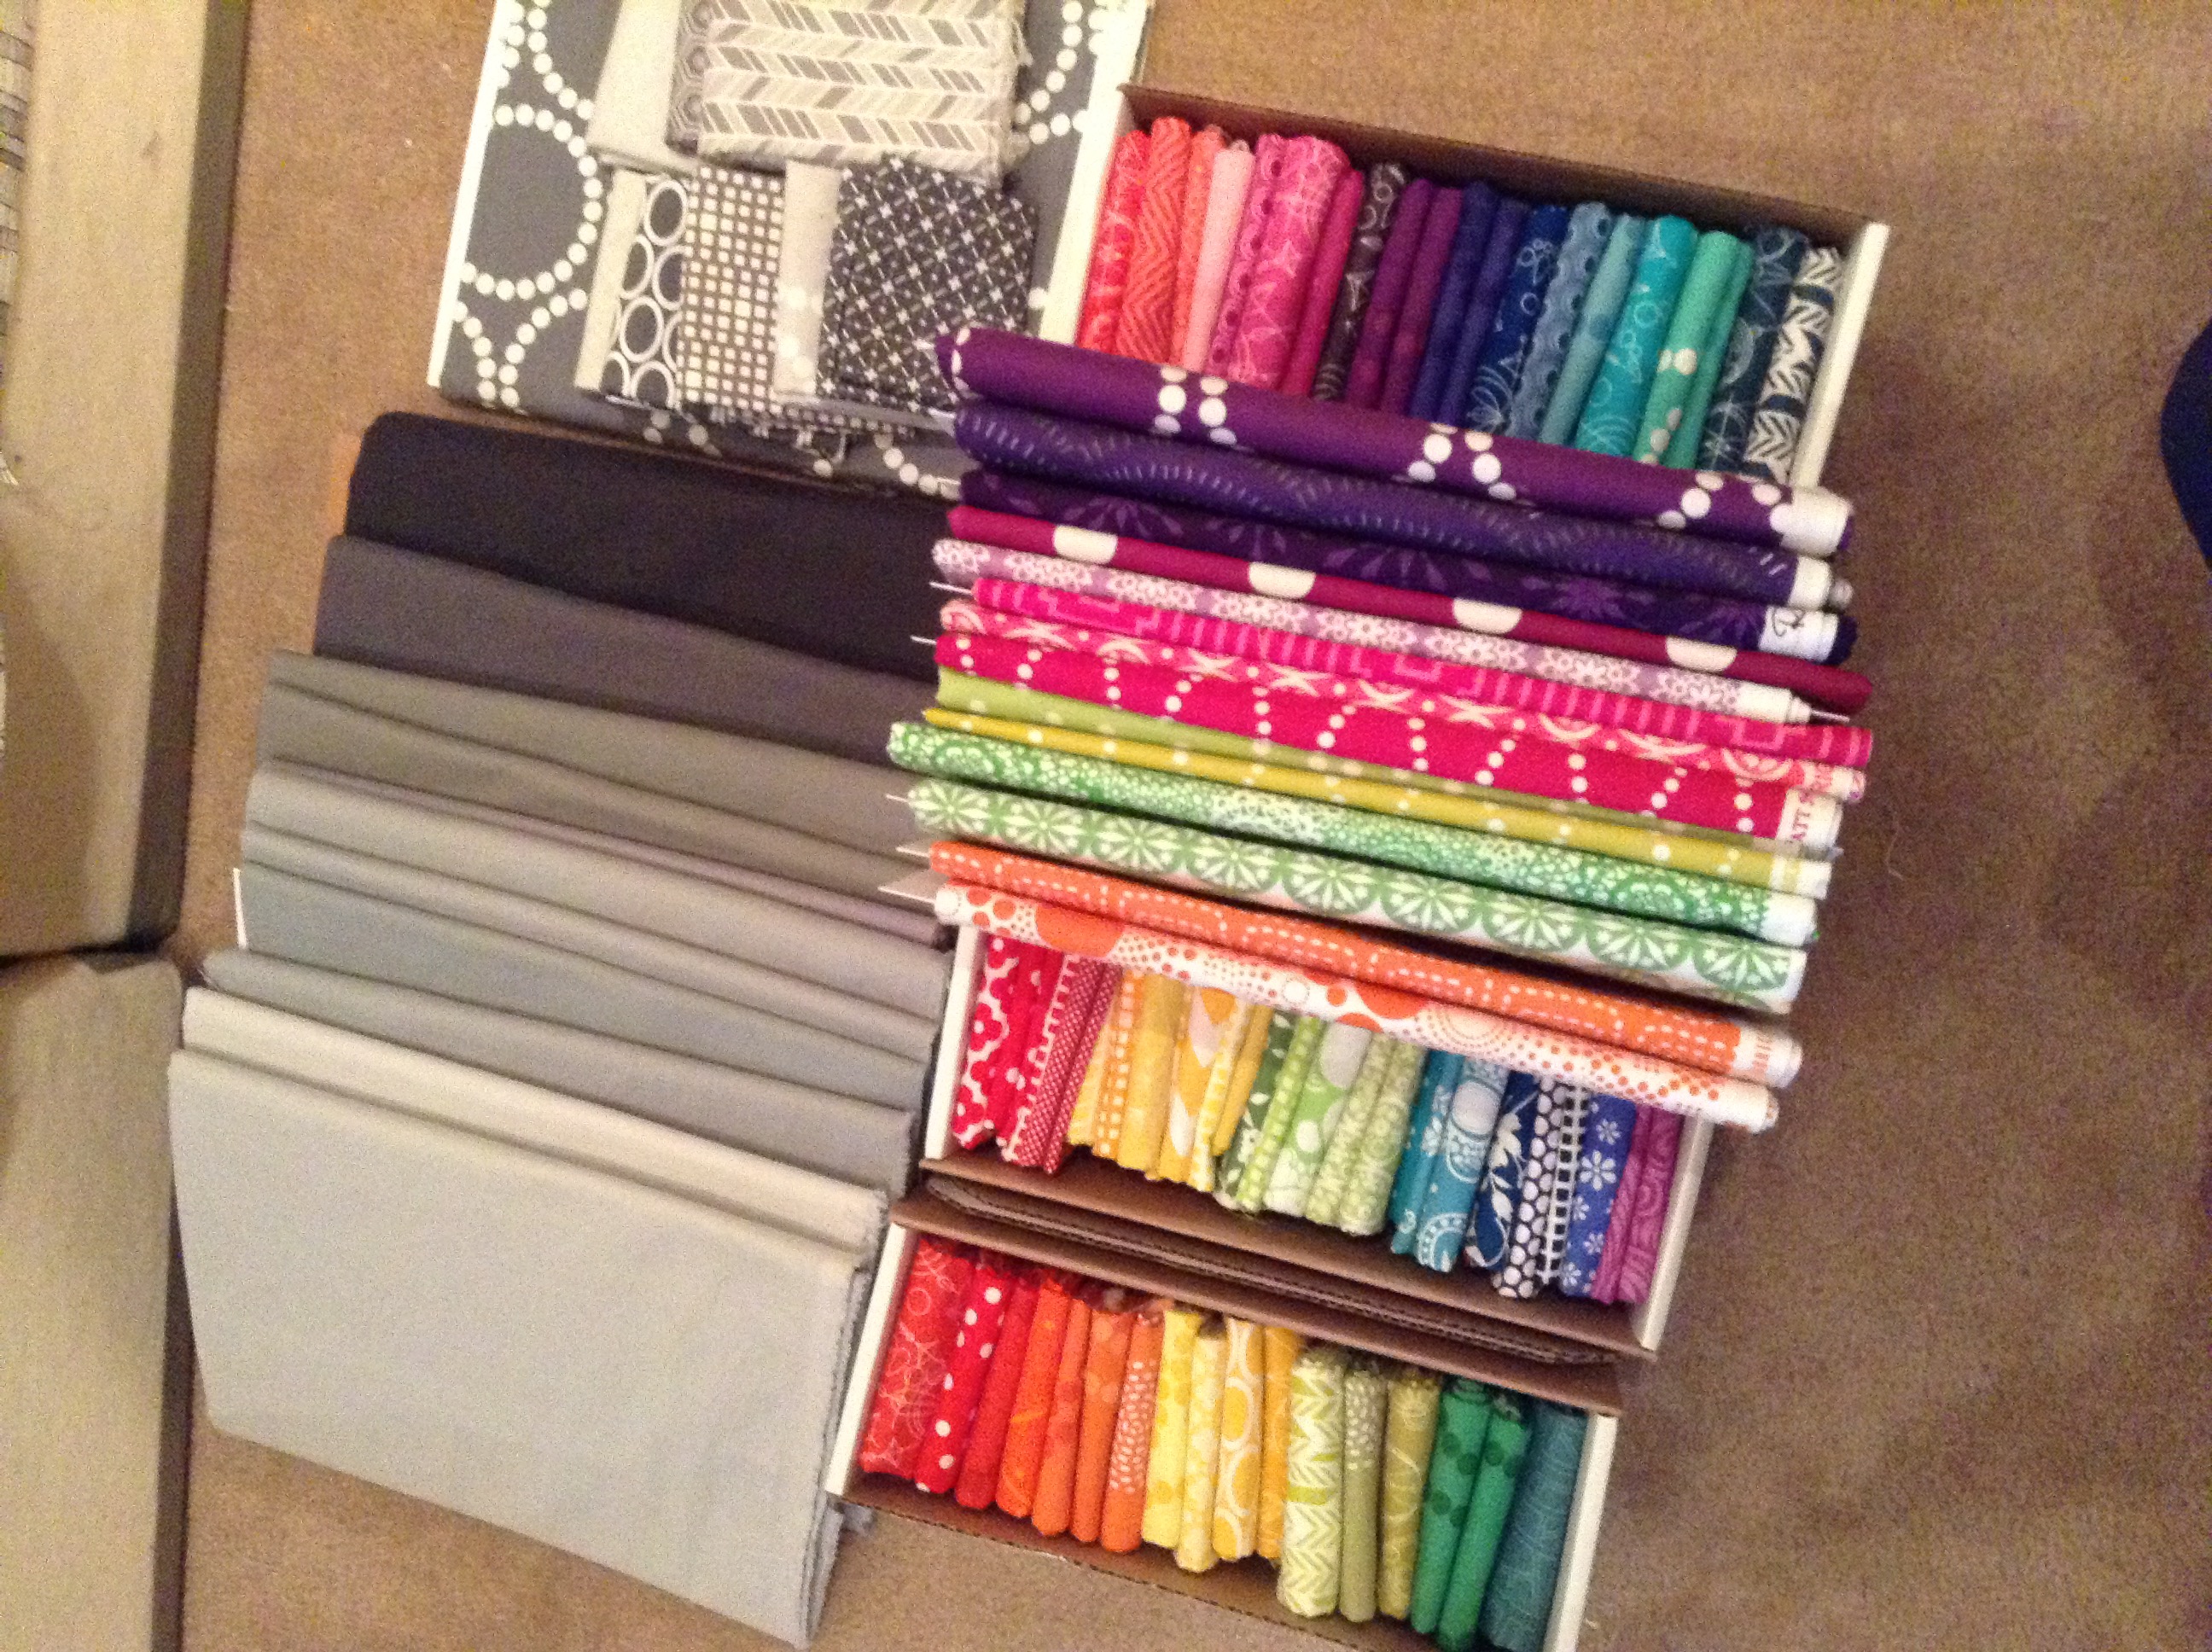
A couple of nights before the workshop, I did a fabric pull. Prints! Think there's enough Lizzy House fabric in here to earn me teacher's pet status or kickass?

Untitled

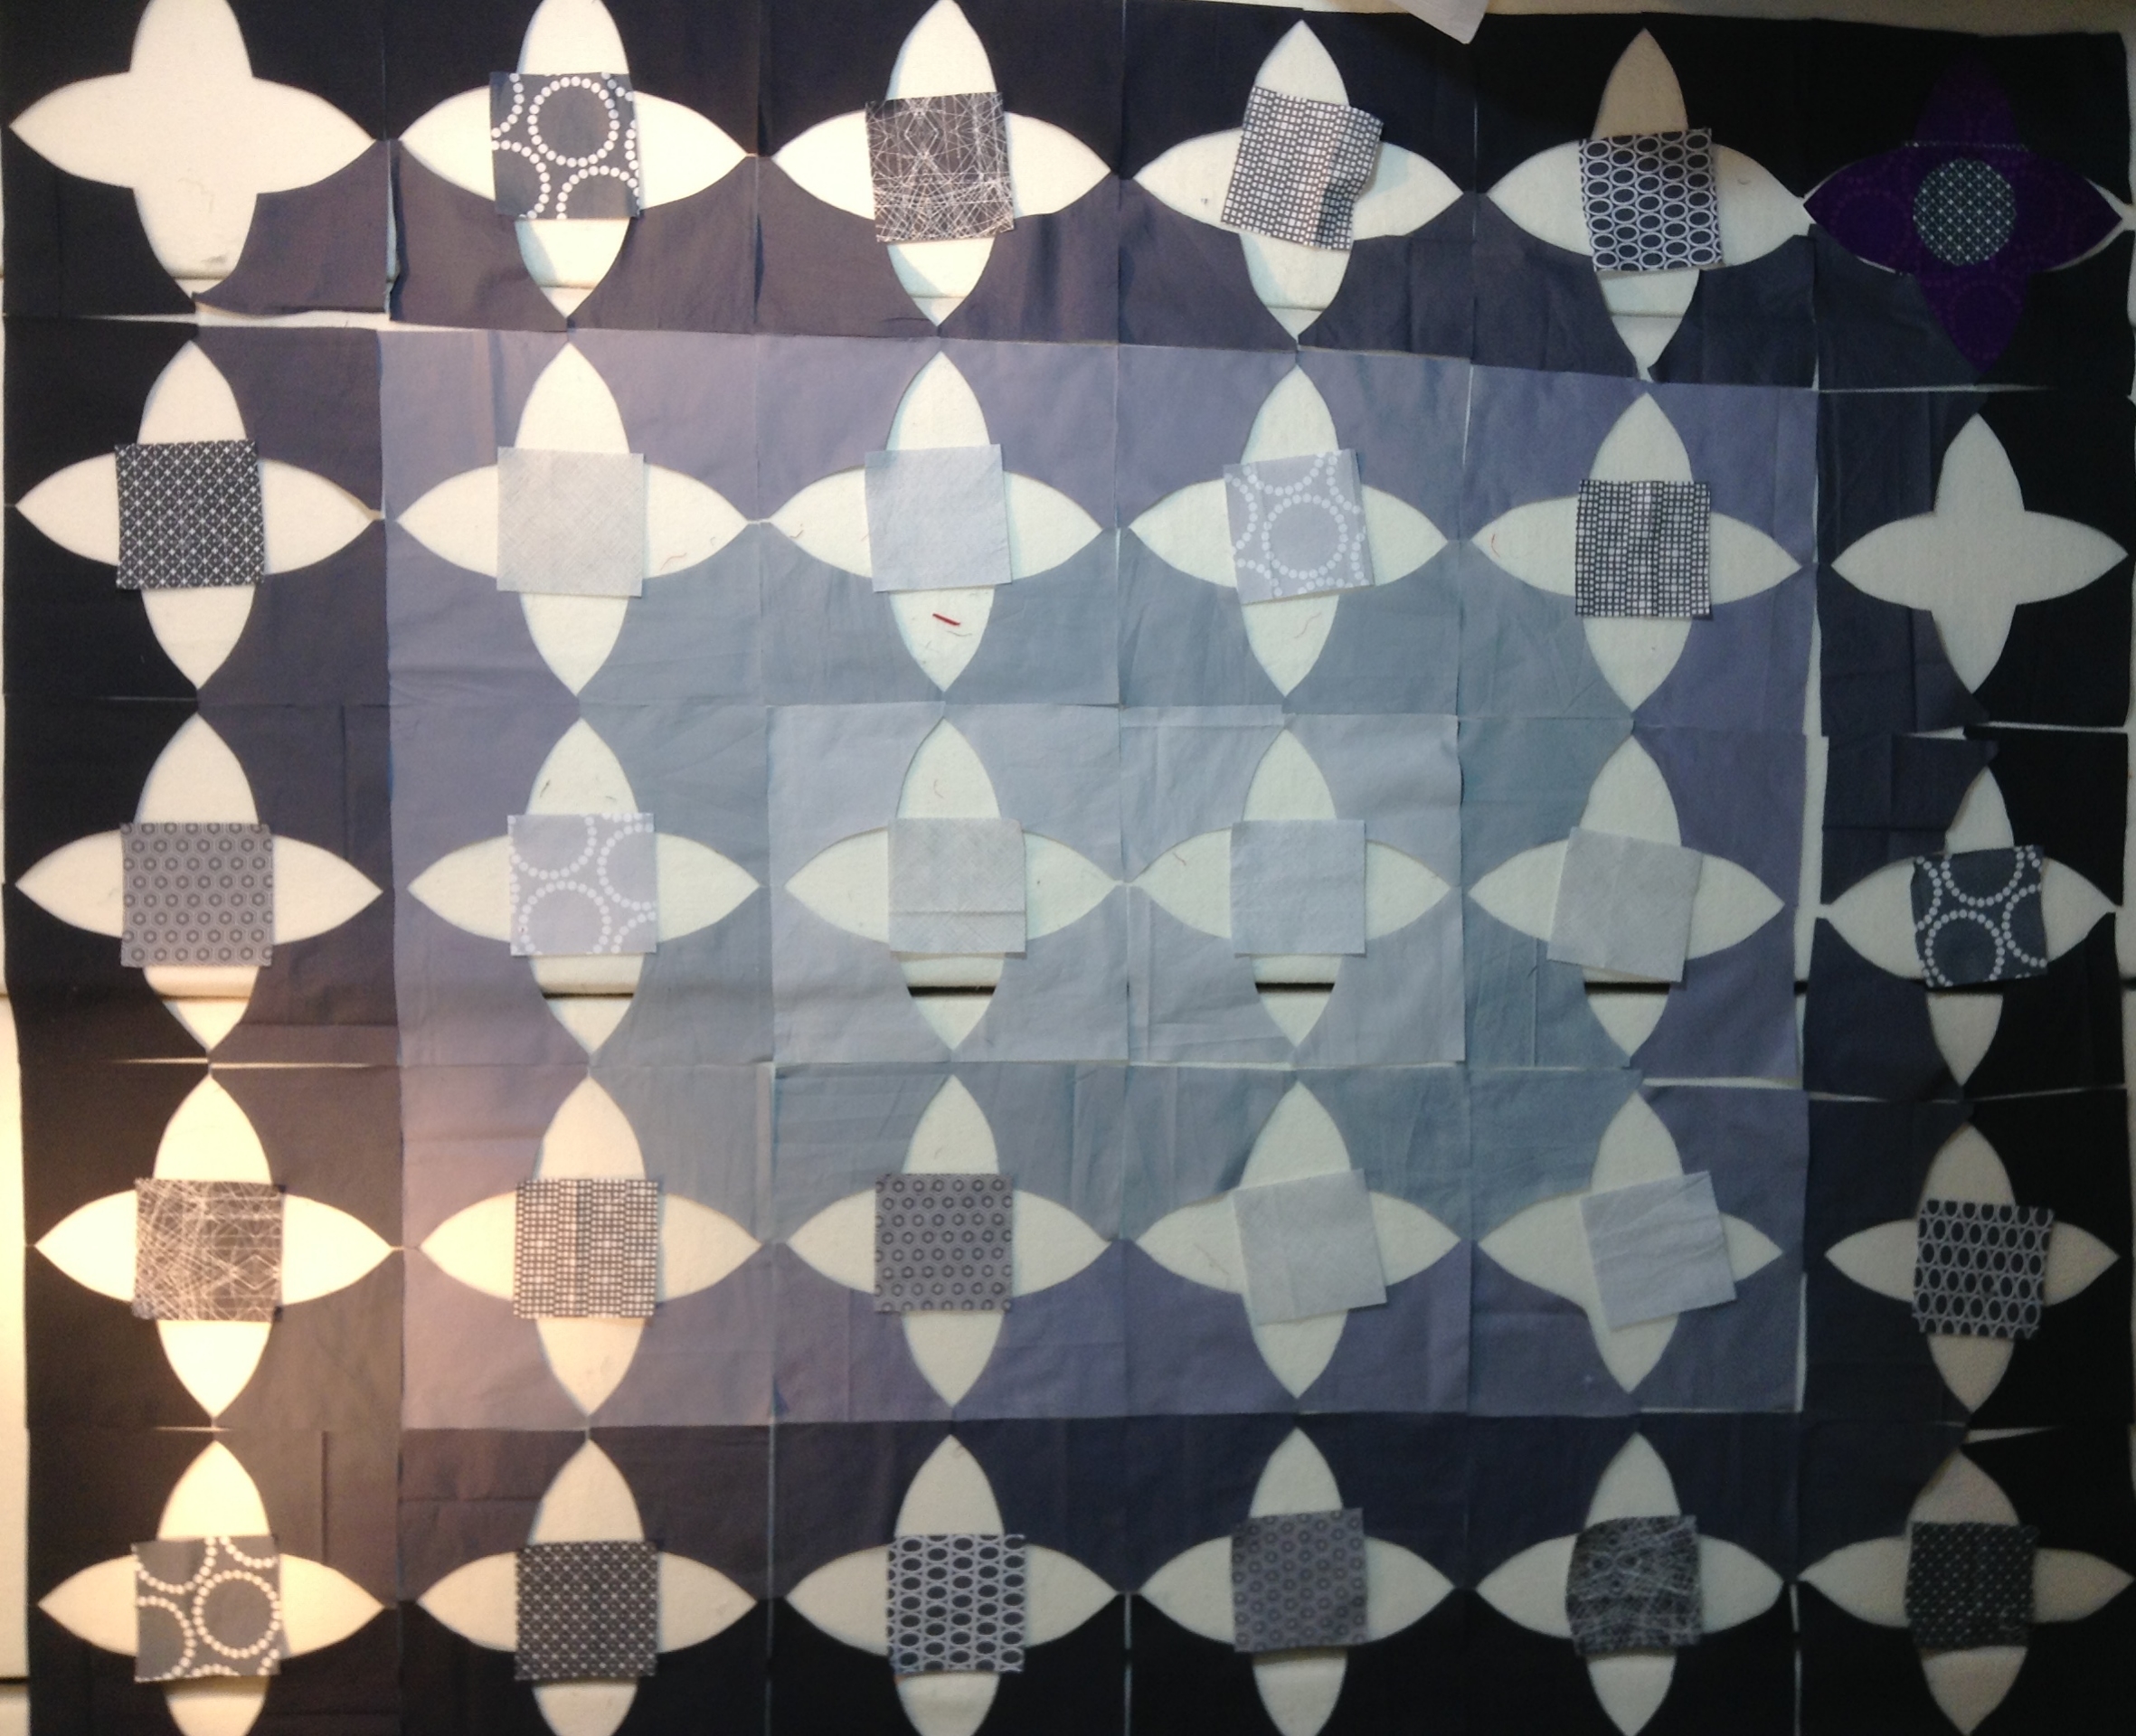
My idea was to invert the design and see what it would look like if I made the stars/flowers with prints and do the background in greys. And I wanted to try playing with the values of the greys. Lizzy was very supportive of my plan and thankfully talked me out of one of my crazier ideas. :)

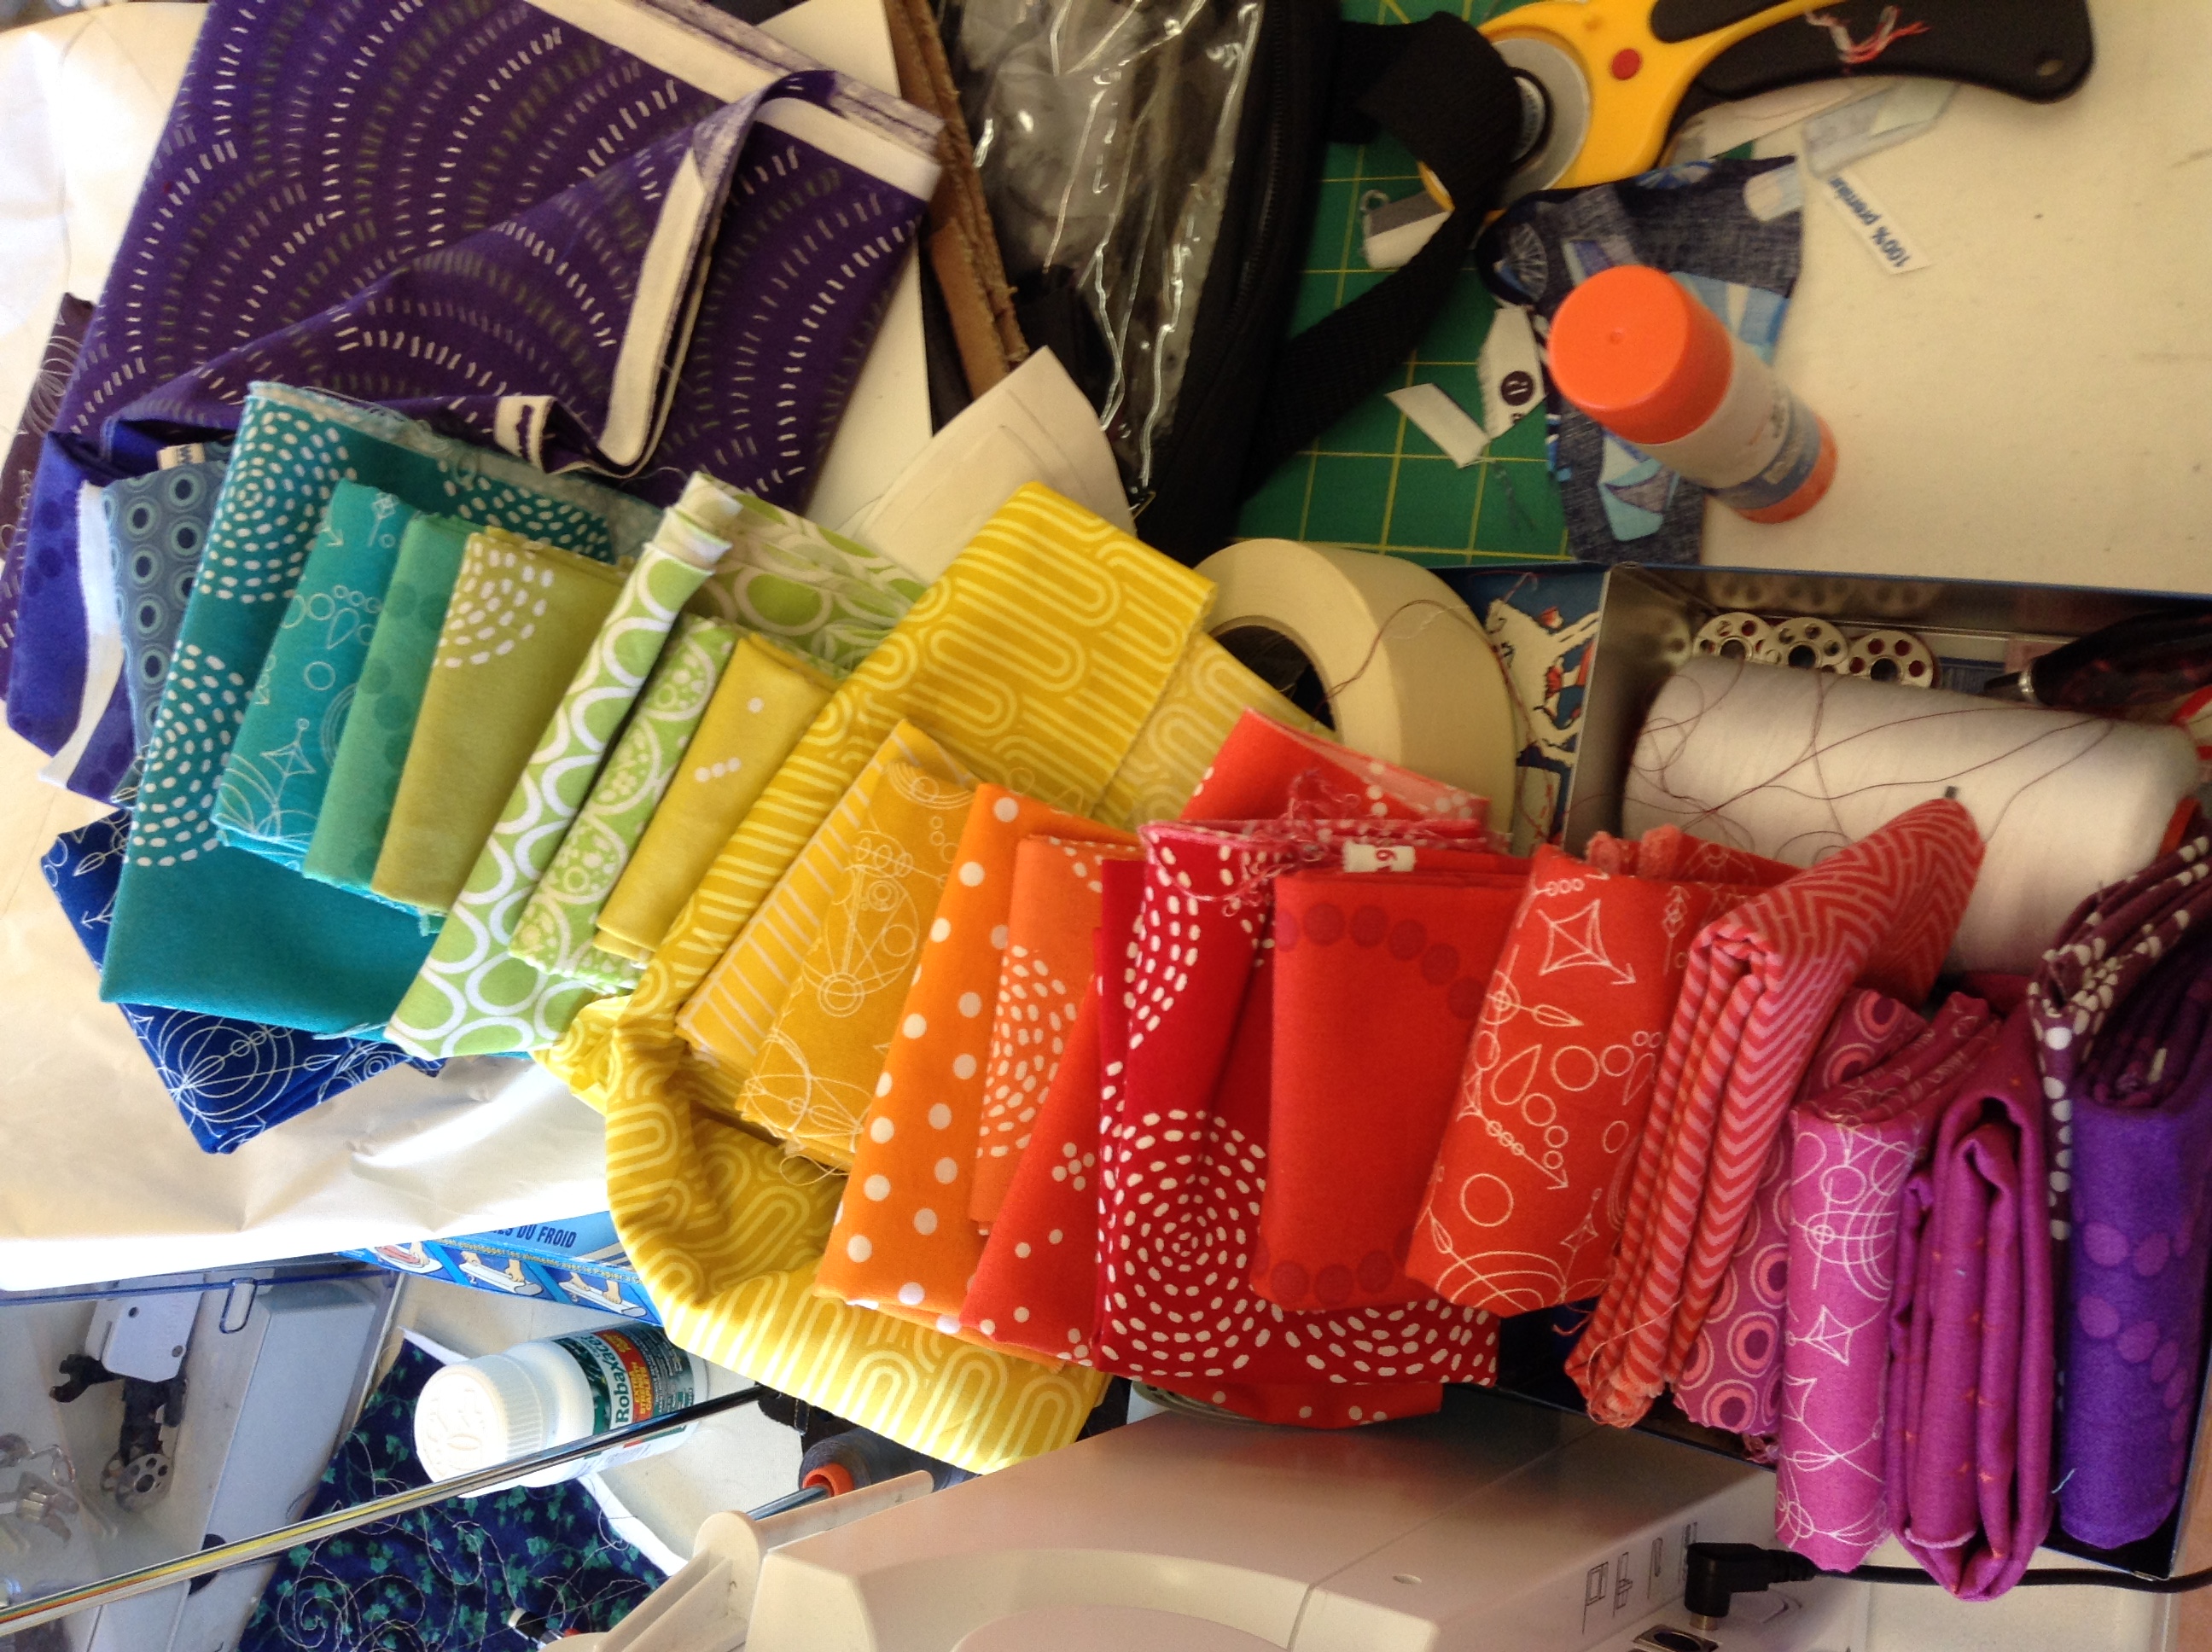
This is the fabric pull I settled on in the workshop.

Untitled

Lizzy's Meadow quilt is a 4 x 5 block arrangement. Well, I had a hard time culling my fabric pull down to less than 28 so I decided to do a 5 x 6 arrangement. 

Going 5 x 6 rainbow for my #meadowquilt #ottmqg 🌈

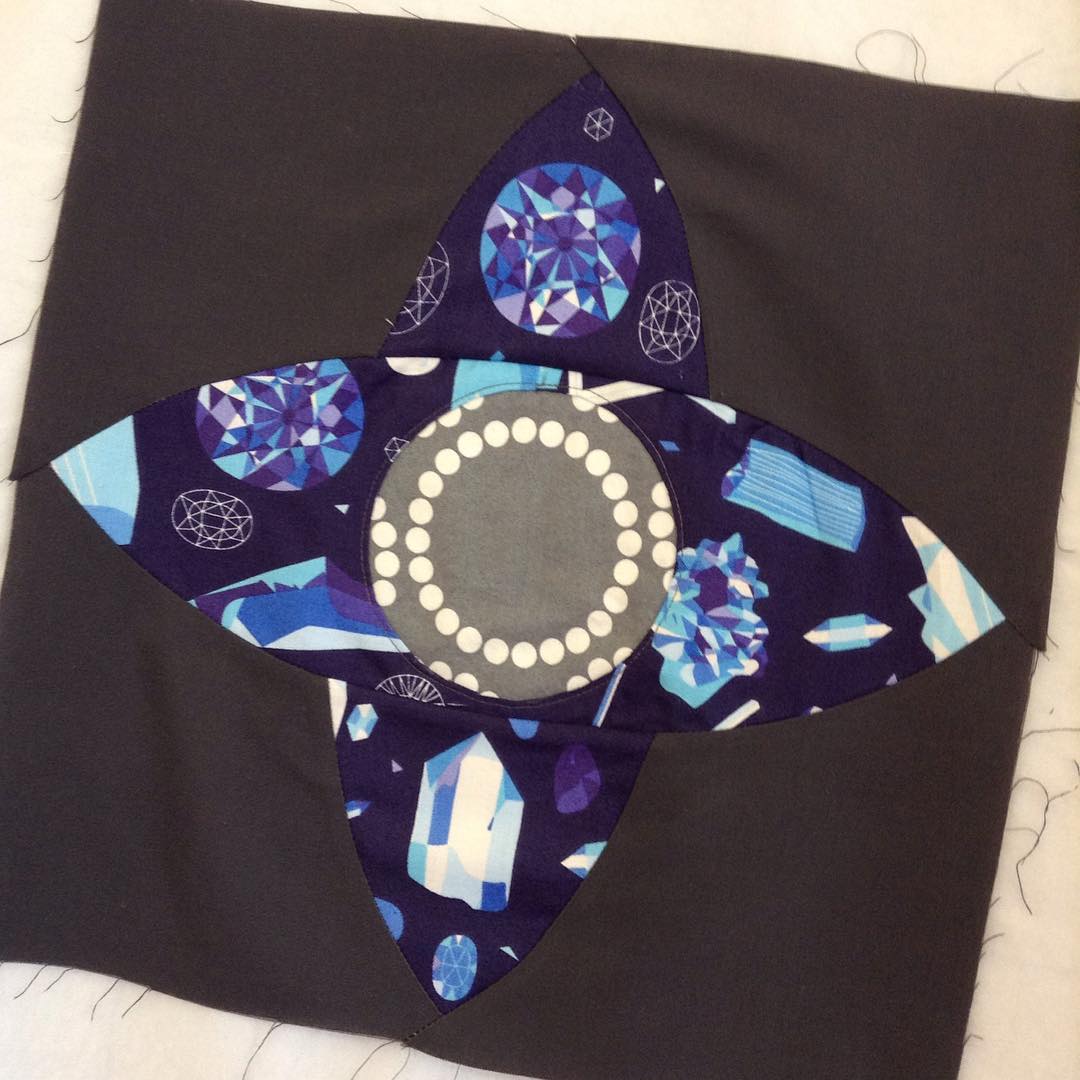
She's a smart one, that Lizzy. She had us do a sample block to test out the technique. Oh gosh, look at that, more Lizzy House fabric. ;)

Test block. Destined to be a pillow for son#1. He's going to flip when he sees the jewels. #ottmqg #meadowquilt

My oldest son is a big fan of rocks and gemstones so this will become a cushion for him. 

Playing with the values of grey in the background (sideways iPod shot).

Untitled

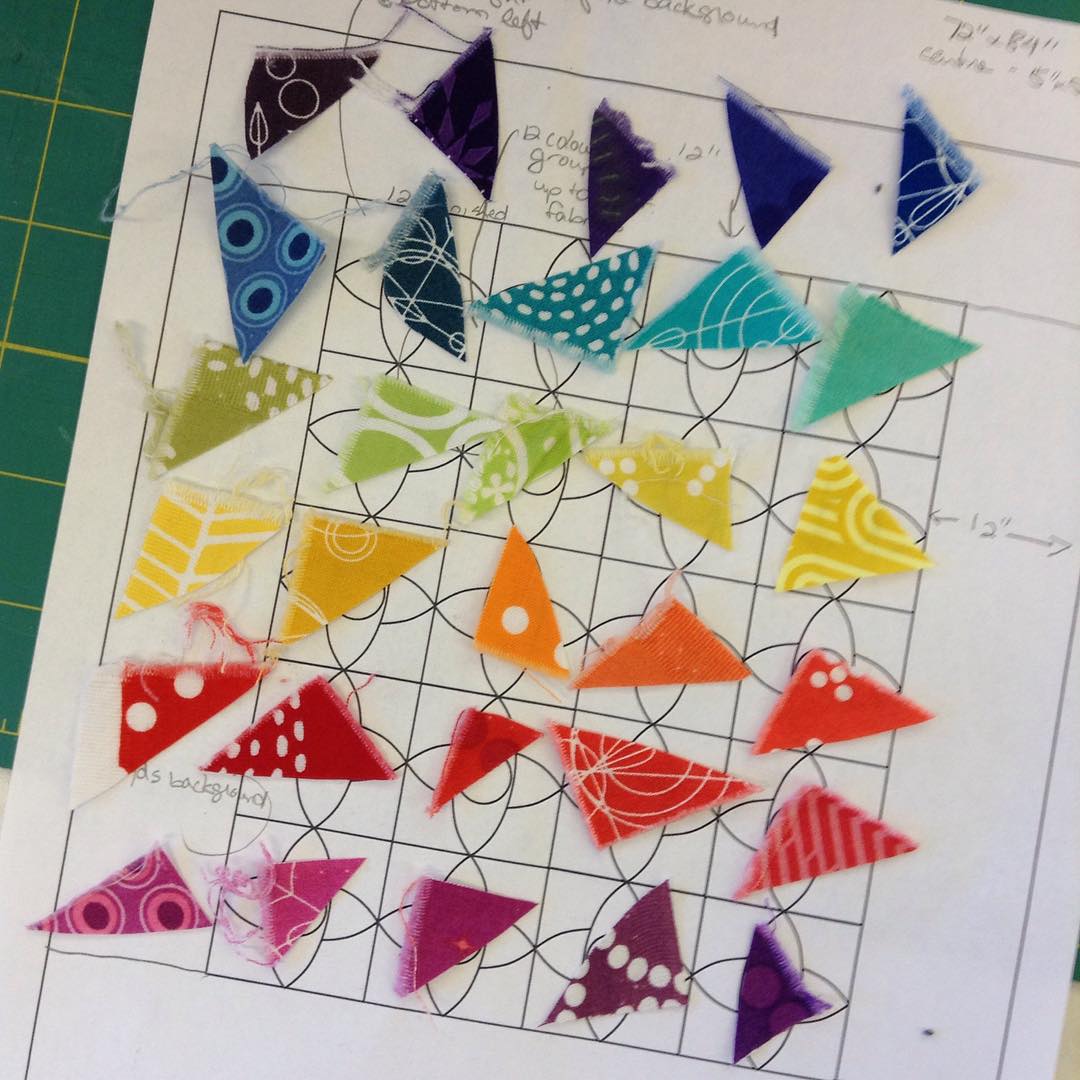
Now to check colour and value placement. 

Option 1: 


Option 2: 


The cool purples in the upper right are bothering me. Replace one of them?


Nah.

Option 3: 


Option 4: 


Now to decide on the background: 

Option A: Having the greys in a value progression from darkest on the outside to lightest on the inside. 


Option B: Have the values interspersed more randomly.


Going into this, I had thought I was set on Option A. Now, I'm not so sure. 

Thoughts? Feeling a little decision fatigue here. 

Thursday 13 August 2015

TGIFF! - Colour Pop Top

Welcome to TGIFF! I seem to be suffering from work-in-progress-itis. I'm making good progress on several projects, but nothing is close to being completely finished. Carsick and Bubbles for Malcolm are even halfway quilted.

I did finish my Colour Pop top though, just in time for TGIFF! Woo hoo! And also in time for International Left-Handers Day. Serendipitous. As a southpaw, I always appreciate a little asymmetry that leans to the left. ;)

Perhaps more interestingly, all prints. Not a solid to be found. It's all black and white and rainbow. And I love it. I still love my solids though.

These are combinations of 1.5", 2.5" and 8" triangles using the HexNMore ruler. I like big triangles and I cannot lie.


From one purple...


To the other.


The top finishes at 52" x 77". It's going to be a good-sized throw quilt.

Now that this one is off the design wall, I have space for my Meadow quilt that I started last weekend at a workshop with Lizzy House. More to come on that soon...and yes, there will be more rainbow. We'll just call it my rainbow phase.

And speaking of rainbows, the Sew Sisters Quilt Shop deal of the month for August is...wait for it... 40% off rainbow Wonderclips. Seriously, I couldn't have lined this up better if I tried. 50 count pack for $26.39. With the Canadian dollar doing so crappy, this is a steal for you U.S. folks. I have a pack of these Wonderclips (and a pack of red and a pack of neon green) and I adore them.


Tuesday 11 August 2015

Games People Play

I carry a sketchbook in my purse and have for about five years now. At first, it was so I could jot or draw ideas for quilts while I was out and about.

When you are a full-time parent of young kids, there is so little in your life that feels like it is yours and yours alone. Your body isn’t yours, your time isn’t yours, your space isn’t yours, your food isn’t yours. I bought the sketchbook so I could capture MY creativity and ideas on MY creative journey.

Ha ha. Yeah, you guessed it. I was wrong. It wasn’t long until MY sketchbook was pulled out in desperation to entertain one or more of my children. “What do you mean you are bored?! We just got here and we can’t leave now so find something to do. Okay, okay, do you want to draw in my sketchbook?”

At first I mourned it (okay, that’s a little dramatic, but you get the point). But then I saw what a treasure this was! Besides the 5-10 minutes of blessed peace and quiet it gave, it was also a place to capture their creativity as well as mine.

Sometimes the kids would rip out their pictures, but usually they left them in. I started having them sign it and adding their names and the date. We’re on the third sketchbook now. My skills are still a little sketchy (sorry, couldn’t resist), but it’s been fun to look back and see their drawing skills progress over the years.

Drawing on top of mommy's sketches...um, not what I had in mind.


Turned into scribbles…


Turned into drawings…


And sometimes those drawings were copies of my sketches!


Recently we took the kids to an adult restaurant, not fancy, but there were no kids' menus or colouring pages. Gasp! Say what?!

After five minutes of ‘boring talking,’ it was clear they needed something to ‘do.’ I pulled out my sketchbook and my middle guy and I started playing a little improv drawing game (I can’t remember when or where I heard this idea, but I doubt it’s an M-R original). The rules of the game were this: I drew a line and my son had to add something to it. He could add a shape as long as it was one continuous line and touched one of my lines. Then I added to his line and we kept taking turns until my son made the call that the drawing was finished. When we were done, we signed it and dated it.


We then showed them to the table and had them guess what they were. There were some, um, interesting guesses from my other sons. Next time, I think we’ll get the whole family to play.

Now I have some great memories to add to the treasures in MY sketchbook. ;)

Wednesday 5 August 2015

Bubbling With Ideas

I'm working away on little Malcolm's Bubbles quilt. The quilting is coming along. So far we have stitch in the ditch around the bubbles and some straight lines on the dark grey side:


Next, I'm mulling over what to do with the bubbles. Pulled out the trial quilting sheets and the dry erase markers and played with a variety of motifs:


Then, the tough part. That darn negative space in the lighter grey. There's a lot of it!

1) Straight lines like in the dark grey?


2) Echo the bubbles?


3) Swirls and pebbles?


4) Break up the space with 'clouds' of different motifs?


Another go at sectioning


Thoughts? Ideas? Opinions? Have a go!
Related Posts Plugin for WordPress, Blogger...